How to Create Custom Widgets for Renewed Tab
3 min read (716 words)Renewed Tab intends to be highly customisable whilst having a good user experience. Taken to the extreme, these two things are in conflict; the more features you add, the harder it is to provide a good user experience. Renewed Tab can’t support every use case by itself - there’s so much you could want to support, and so little time. It would also make the download huge.
The solution to this is to allow custom user content. By making it easy for users and third-party developers to create their own widgets and functionality, it becomes possible to support a lot more without increasing complexity.
Renewed Tab allows you to create custom widgets using the IFrame widget. IFrames isolate third-party code and UIs, protecting the user’s privileged information such as bookmarks and recent sites. Most browser extension stores prohibit remote code, so using an IFrame is a requirement. This does impose some limits on what is possible in custom widgets - you are limited to your widgets, and can’t change the UI elsewhere.
Please note that this is still experimental and a bit manual. In the future, we plan to improve support for third-party widgets, making it easier for users to use them and allowing more integration with the built-in UI.
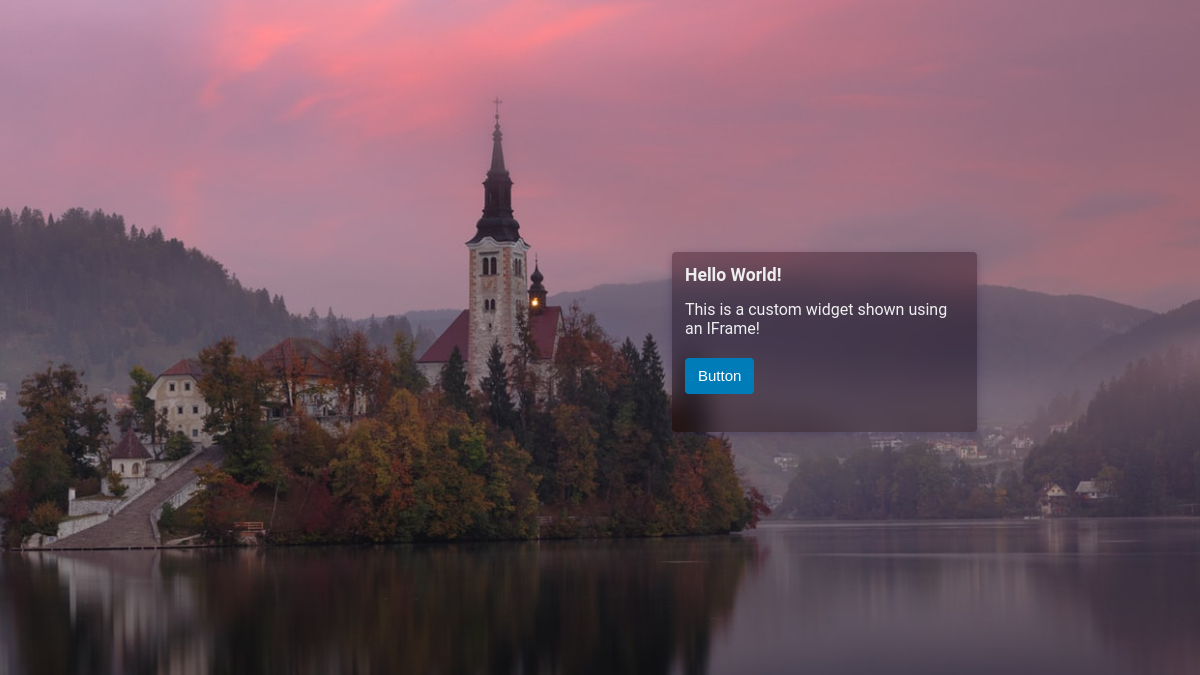
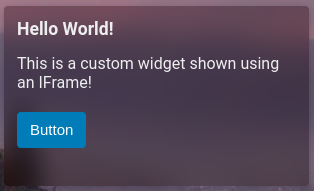
Hello World widget
Renewed Tab uses the React framework, but you’re free to use whatever framework you like. We will be using React in this tutorial. We recommend using Renewed Tab’s CSS as a basis, however, to keep a consistent theme.
Get the repository
Clone or download our React widget template:
git clone https://gitlab.com/renewedtab/custom_widget_template
Run npm install to install the dependencies.
Serving on localhost
Renewed Tab can’t access files on your computer. In order to add your custom widget to Renewed Tab, you’ll need to make it available using a server of some kind. The best way to do this locally for testing is using something called a live HTTP server. Our example template uses webpack-dev-server for this purpose.
Run npm start to build the app and start the live server at
http://localhost:8080. Once this is done, open it in your browser to check
that it works.
Adding to Renewed Tab
Now that you have a working live server, you can add your widget to your Renewed Tab install. If you don’t want to change your browser’s New Tab for this, you can use the online version.
Enter edit mode by clicking the pencil in the bottom right, click “+ Add Widget”, then click “IFrame”. Find the new IFrame, hover over it, and click the pencil to open the Edit IFrame model.

Set the URL to http://localhost:8080. You’ll also probably also want to check
“Show panel background”.
Press OK, you should now see the widget. Try resizing and moving the widget, it should adapt to the available space.
Distributing the Widget
Run npm run build to build the widget. Share the dist/ folder publicly to
distribute your widget. A good way to do this is using GitLab pages, as it
supports updating a static website using CI.
See the .gitlab-ci.yml of the template. It deploys the widget to
https://renewedtab.gitlab.io/custom_widget_template/.
Conclusion
Whilst support for custom widgets is in its early days, it’s still possible to do a lot of cool things with it.
In the future, we’ll be adding an official plugins API which will make it super easy to add custom widgets to Renewed Tab. Users will be able to find plugins in the settings menu or add them by URL. Plugins will be able to add widgets to the “Add Widgets” menu.
Make sure to share any creations you make on Mastodon (tag @rubenwardy@fosstodon.org), Discord, or Matrix. See Get Involved.